
電影感拖曳登陸頁面 — The Golden Template
建立一個高品質、具品牌意識的登陸頁面,讓英雄影片能回應滑鼠,而頁面其餘部分則引導使用者經歷一個 5 拍敘事弧線。使用者提供影片,以及選填的商標、產品照片和品牌背景 — 此技能會處理色板提取、字體選擇、RTL/LTR、專案建構、全關鍵影格影片重新編碼、滑鼠拖曳效果、區塊庫與驗證。
為什麼有這個技能
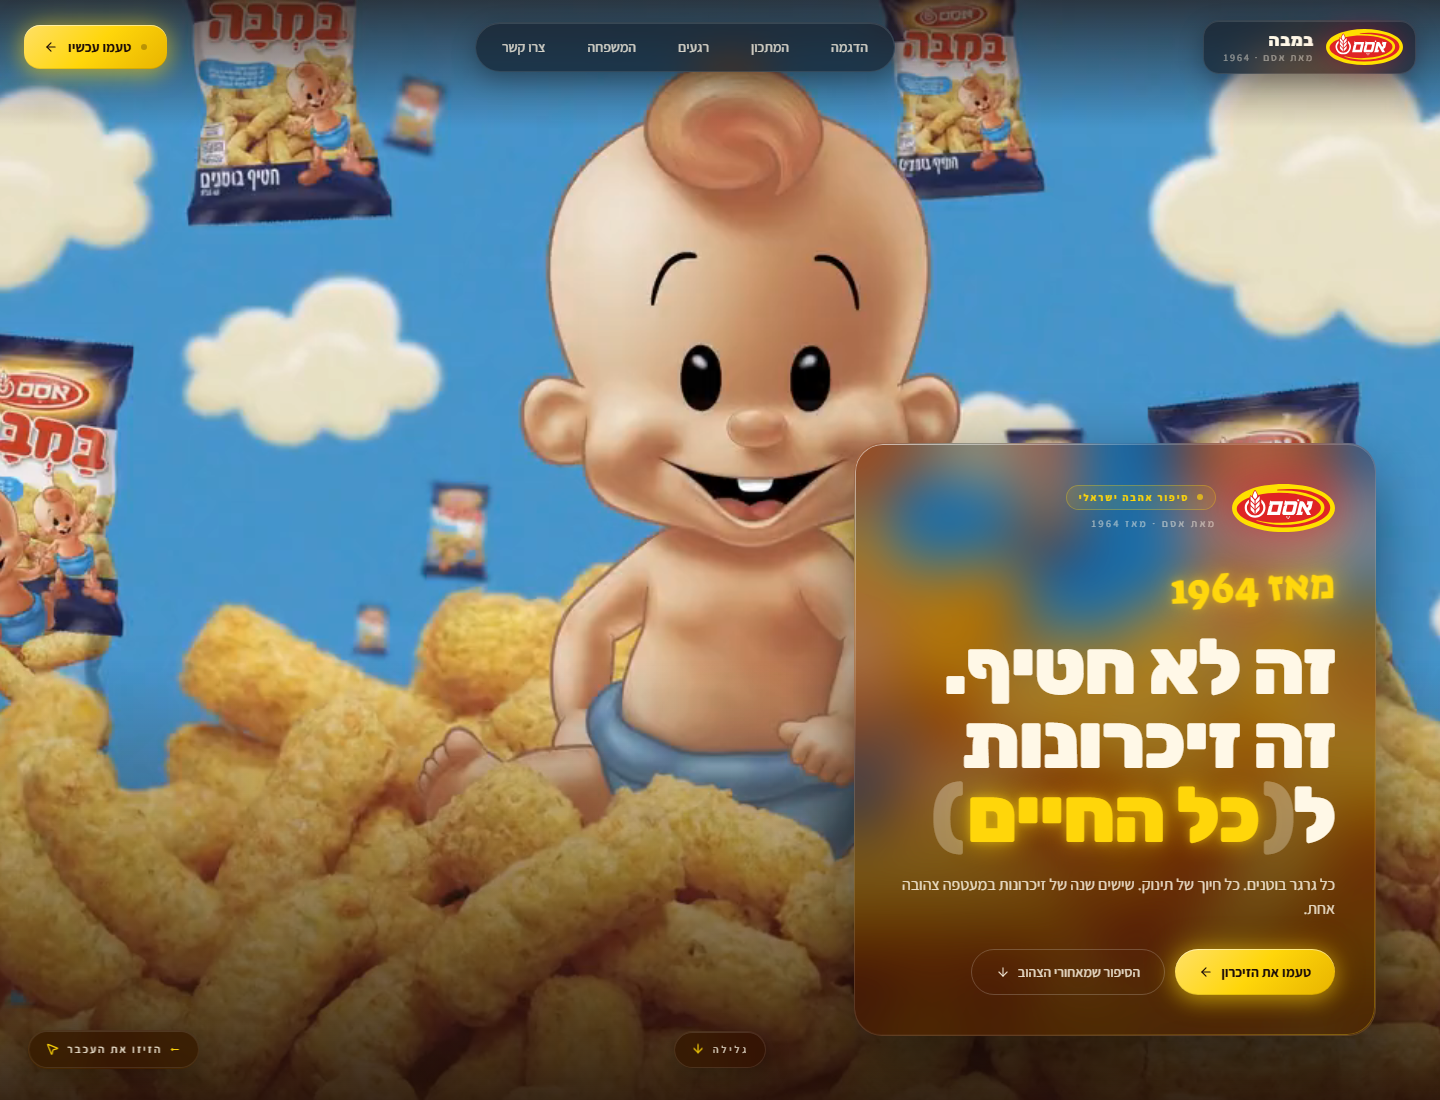
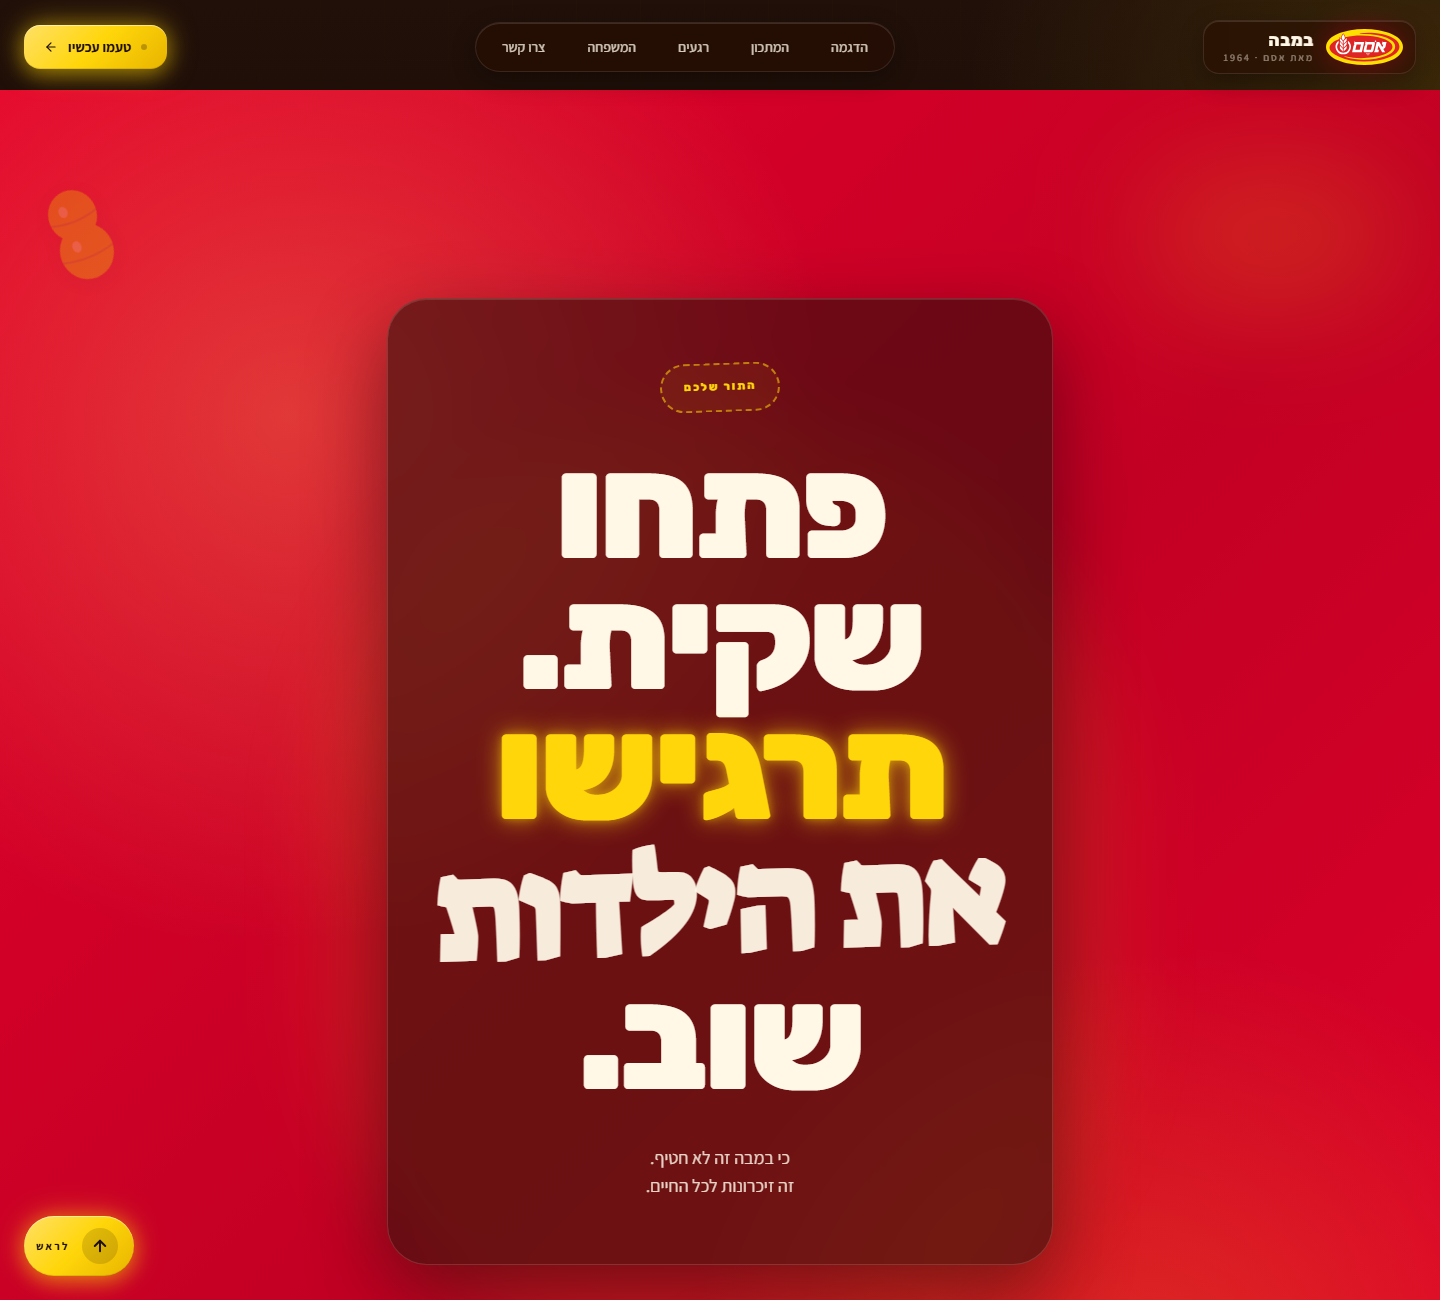
參考實作位於 https://github.com/hoodini/bamba — 一個針對以色列零食「במבה」的 RTL 網站,其中一個嬰兒影片會隨著滑鼠在整個頁面上移動,而下方 4 個不同的區塊(亮黃食譜、奶油懷舊相簿、深色沉思定價、紅色行動結尾)則引導使用者經歷 渴望 → 喜悅 → 懷舊 → 沉思 → 行動。

這個技能中的每一條規則都來自該建置。下方 嚴格規則章節 中的要點全都是得來不易的 — 它們會覆蓋通用的「良好程式碼」預設值。
區塊圖庫(你要建置的內容)
英雄區位於頂部。在它下方,從區塊庫中挑選 4 個區塊,依照敘事弧線順序排列。每個區塊都是完全不透明的(無影片穿透),並擁有自己的品牌識別:
| 節拍 | 類型 | 參考 |
|---|---|---|
| 1 — 渴望 | 英雄區(滑鼠拖曳影片) | |
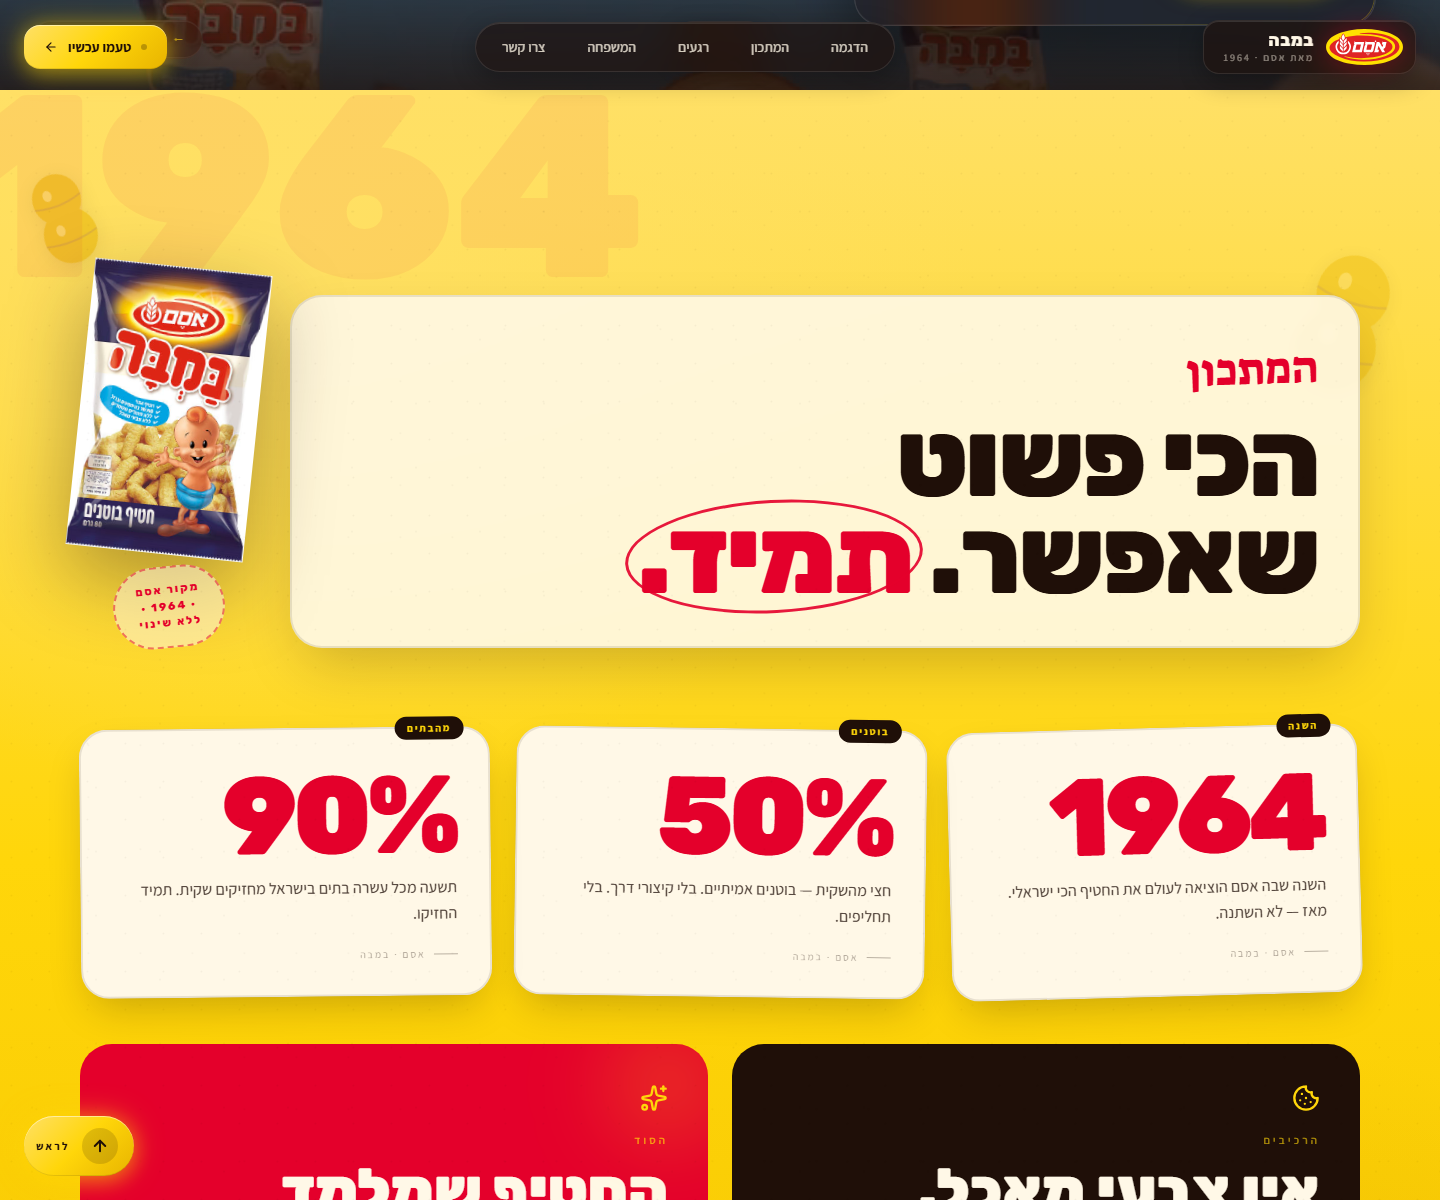
| 2 — 喜悅 | 陽光區 — 明亮的主色加重漸層、浮動主題 SVG、巨大幽靈字體、統計卡片 |  |
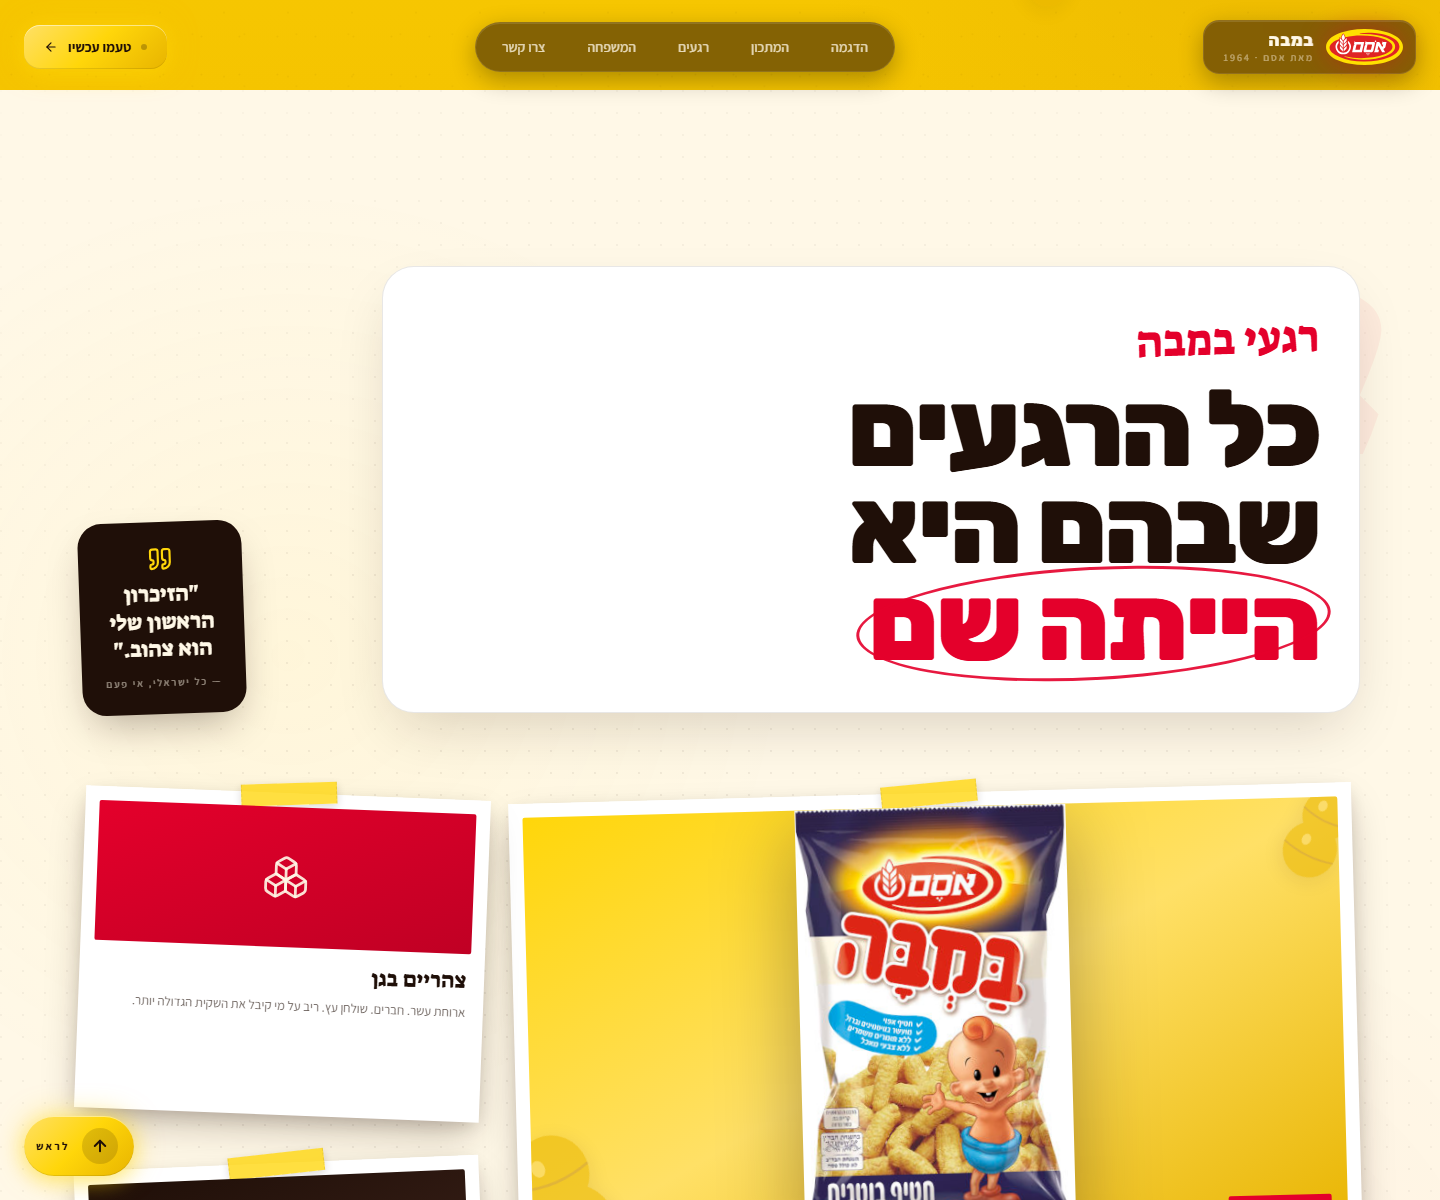
| 3 — 懷舊 | 相簿區 — 奶油色紙張、點狀微圖案、拍立得風格 Bento 佈局並放入真實產品照片 |  |
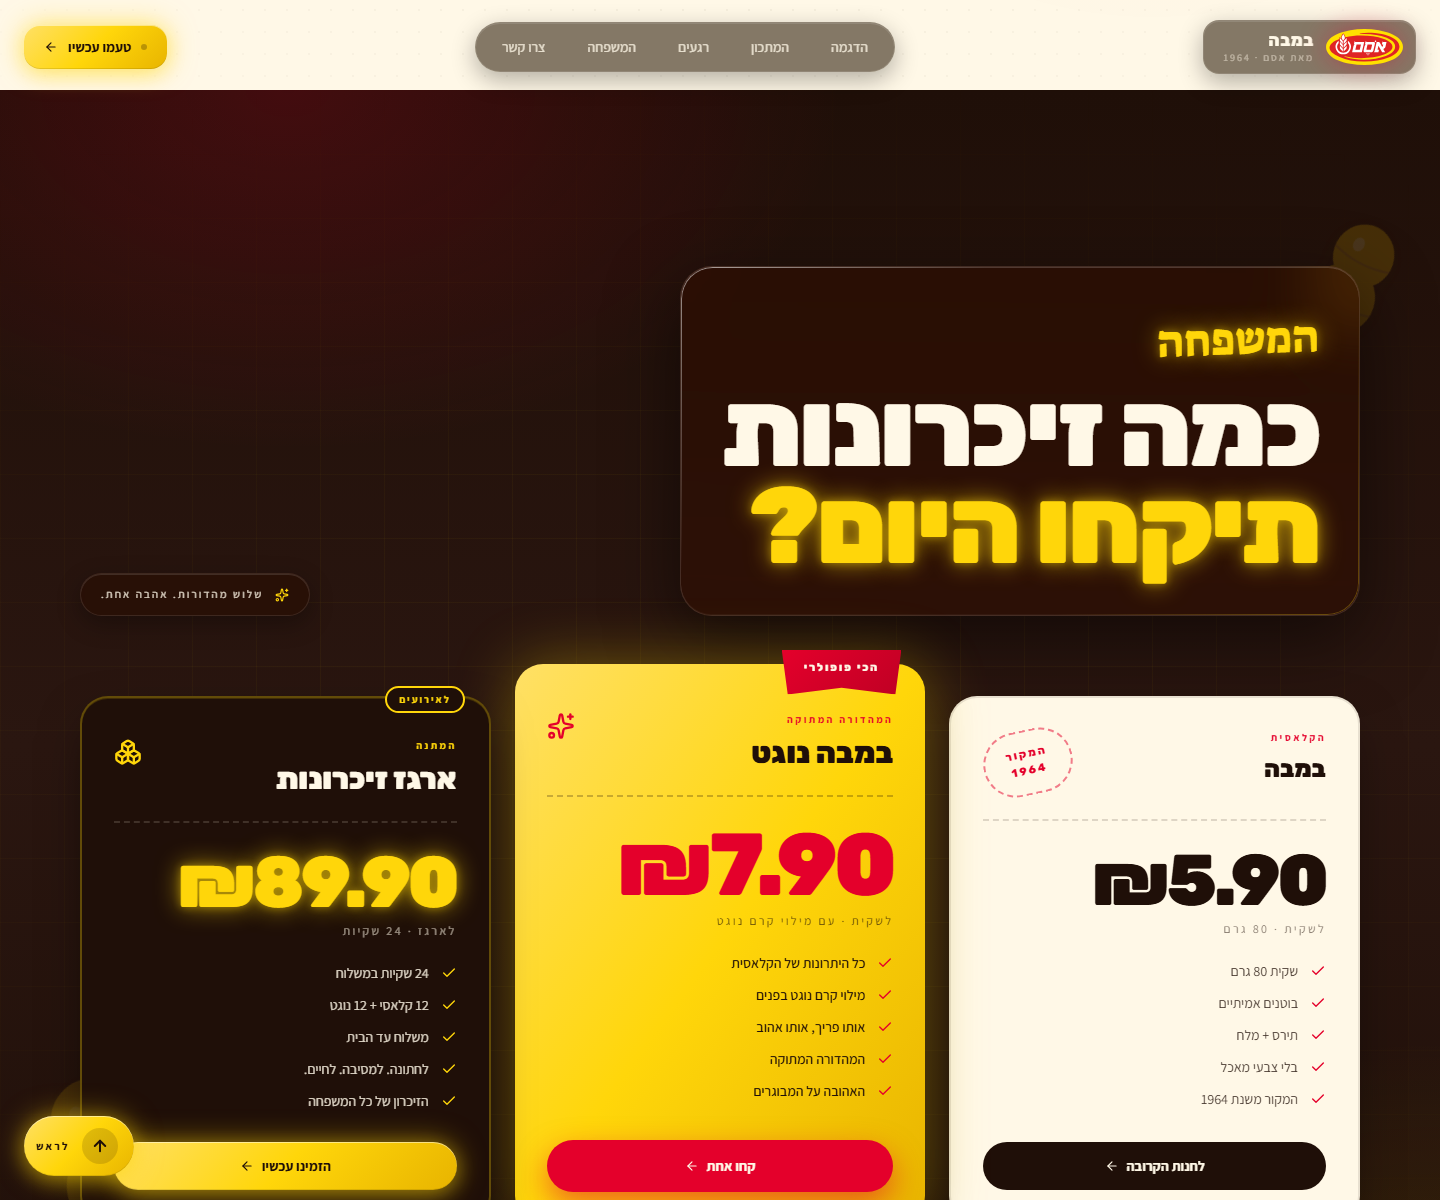
| 4 — 沉思 | 烘烤區 — 深色背景搭配放射狀加重色光暈、三張各有不同視覺處理的定價卡片 |  |
| 5 — 行動 | 信號區 — 滿版強烈加重色(紅/橙/綠)、巨大標題加上行動呼籲按鈕、玻璃面板容器 |  |
對於技術 / SaaS 品牌,可視需要替換區塊類型(請參閱下方的區塊庫)— 但始終以信號區作為結尾。
如何使用這個技能
-
將素材放入一個乾淨的工作目錄:
- 英雄影片(任何容器格式 —
.mp4、.mov、.webm) - 商標(強烈建議使用 SVG;接受帶透明度的 PNG)
- 1-3 張產品/主題圖片(JPG/PNG,理想狀況下要有透明背景)
- 英雄影片(任何容器格式 —
-
與使用者確認(簡短 — 提出預設值,然後繼續):
- 產品名稱 + 元標語
- 語言代碼(決定 RTL/LTR 及字體選擇)
- 品牌背景 — 時代、受眾、情感核心、色板感覺
- 選填:明確的色板十六進位碼、敘事弧線節拍
-
依序執行下方的工作流程。 所有階段都是強制的。不要跳過 ffmpeg 重新編碼 — 那是讓拖曳感覺流暢的魔法。
-
在報告完成之前進行驗證。 階段 9 有 12 項檢查。全部執行。
輸入 — 從使用者收集這些資料
PRODUCT_NAME: "<例如 במבה / Bamba / Hope the Cheetah / Acme CRM>"
TAGLINE: "<元訊息 — 例如 'it\'s not a snack, it\'s lifelong memories'>"
LANGUAGE: "<he | en | ar | es | fr | ja | ...>"
IS_RTL: "<true | false>"                                   # he/ar/fa = true;其他全部為 false
HERO_VIDEO_FILE: "<工作目錄中的確切檔案名稱 — 例如 baby2.mp4>"
LOGO_FILE: "<確切檔案名稱 — 如無則留空>"
PRODUCT_IMAGE_FILE: "<確切檔案名稱 — 如無則留空>"
BRAND_CONTEXT: |
  <2-4 句話:它所喚起的時代、目標受眾是誰、情感核心、
  視覺識別(溫暖/冷色調/有趣/嚴肅)。驅動色板與主題。>
PALETTE: "<選填 — 如果覆蓋則以逗號分隔的十六進位碼>"
NARRATIVE_ARC: "<選填 — 5 個情感節拍;如果留空則由 AI 提出>"
完整的文字模板(包含相同的 YAML 區塊和提示主體)位於 references/GOLDEN_PROMPT.md — 當你無法直接使用技能執行環境時,將它貼到 Claude 並填好 YAML。
階段 0 — 規劃設計(在編寫程式碼之前輸出 ≤200 字的簡報)
在編寫任何程式碼之前,請輸出:
-
提取的 5 色色板:
background(最深色)、cream(暖色米白文字 — 絕對不要#FFFFFF)、accent(主要品牌色)、accent2(次要品牌色)、support(第三色調)。如果未提供PALETTE,則從商標和產品圖片中提取。色板必須內部一致 — 全部暖色或全部冷色,絕不混合。暖色品牌(食品、自然、懷舊、動物)→ 沒有藍色、藍綠色、薄荷色、青色。冷色品牌(科技、金融、醫療、科幻)→ 除了極小面積的點綴外,沒有暖色調。 -
適合語言的字體三重奏(顯示 / 內文 / 手寫加重):
he:Rubik(顯示)+ Assistant(內文)+ Suez One(加重)en:Anton(顯示)+ Inter(內文)+ Caveat(加重)ar:Cairo(顯示)+ Tajawal(內文)+ Reem Kufi(加重)es/fr/it/de:Anton 或 Bebas Neue(顯示)+ Inter(內文)+ Caveat(加重)ja:Noto Sans JP weight 900(顯示)+ Noto Sans JP(內文)+ Yusei Magic(加重)- 其他語言:選擇三個符合該文字系統的 Google Fonts,並具有相同的
顯示-黑色 / 內文-清晰 / 手寫-腳本角色。
-
敘事弧線 — 5 個情感節拍,對應到
BRAND_CONTEXT。每個節拍對應到區塊庫中的一個區塊類型。
然後執行 — 不需要徵求確認。
階段 1 — 素材準備(魔法步驟)
1a. 驗證 ffmpeg
which ffmpeg # 或在 PowerShell 中執行:Get-Command ffmpeg
如果缺失,請停止並告知使用者安裝(brew install ffmpeg / Windows:http://ffmpeg.org)。
1b. 將英雄影片重新編碼,使每個影格都成為關鍵影格
瀏覽器只能立即跳轉到關鍵影格 — 標準影片大約每 250 個影格有 1 個關鍵影格,這會使滑鼠拖曳變得非常卡頓。這個單一指令是區分高品質與業餘水準的關鍵:
ffmpeg -y -i <HERO_VIDEO_FILE> -g 1 -keyint_min 1 -c:v libx264 -preset slow -crf 20 -pix_fmt yuv420p -an hero.mp4
驗證輸出:hero.mp4 應該在 5-50 MB。如果 > 50 MB,使用 -crf 25 重新執行;如果 > 80 MB,使用 -crf 28。移除音訊(-an)— 英雄影片是無聲的。
1c. 複製商標與產品圖片
cp <LOGO_FILE>           public/logo.<ext>
cp <PRODUCT_IMAGE_FILE>  public/product.<ext>   # 如果有提供
階段 2 — 建立專案骨架
npm create vite@latest site -- --template react-ts
cd site
npm install
npm install lucide-react
npm install -D tailwindcss@3 postcss autoprefixer
npx tailwindcss init -p
mkdir -p public
mv ../hero.mp4 public/hero.mp4
# 也將商標和產品圖片移到 public/ 目錄
階段 3 — Tailwind 設定
完全取代 tailwind.config.js。使用提取的色板以及適合語言的字體:
/** @type {import('tailwindcss').Config} */
export default {
  content: ["./index.html", "./src/**/*.{js,ts,jsx,tsx}"],
  theme: {
    extend: {
      colors: {
        background: '<ink/dark>',
        cream:      '<warm off-white — NEVER #FFFFFF>',
        accent:     '<primary brand color>',
        accent2:    '<secondary>',
        support:    '<tertiary>',
      },
      fontFamily: {
        sans:    ['<body font>',         'system-ui', 'sans-serif'],
        display: ['<display font>',      'sans-serif'],
        accent:  ['"<handwritten font>"', 'cursive'],
      },
    },
  },
  plugins: [],
}
階段 4 — index.html
完全取代。請遵守 IS_RTL。始終包含指向商標的 favicon 連結:
<!DOCTYPE html>
<html lang="<LANGUAGE>" dir="<rtl|ltr>">
  <head>
    <meta charset="UTF-8" />
    <link rel="icon" type="image/svg+xml" href="/logo.svg" />
    <link rel="apple-touch-icon" href="/logo.svg" />
    <meta name="viewport" content="width=device-width, initial-scale=1.0" />
    <link rel="preconnect" href="https://fonts.googleapis.com">
    <link rel="preconnect" href="https://fonts.gstatic.com" crossorigin>
    <link href="<所選三種字體的 Google Fonts URL>" rel="stylesheet">
    <title><PRODUCT_NAME> — <TAGLINE></title>
  </head>
  <body>
    <div id="root"></div>
    <script type="module" src="/src/main.tsx"></script>
  </body>
</html>
階段 5 — index.css(設計系統)
完全取代。以下每個工具類別都很重要。名稱假設使用稍早提取的暖色色板;對於冷色品牌,請將陰影色調中的「yellow」/「red」提及替換為實際的加重色。
必須包含:
html { scroll-behavior: smooth; }+section[id] { scroll-margin-top: 90px; },以便錨定的區塊不會落在固定導覽列下方。body背景 =background顏色(影片載入失敗時的備用方案)。游標 =crosshair。預設字體 = 內文無襯線字體。.liquid-glass/.liquid-glass-strong— 背景模糊 + 飽和度 + 內緣光邊框 + 漸層遮罩邊緣反光。強烈變體使用帶有accent色調的內緣光暈。.glass-pill— 使用相同玻璃效果的緊湊圓角藥丸形狀,用於導覽項目和小型徽章。.cta-primary— 品牌行動呼籲按鈕:linear-gradient(135deg, accent-light, accent, accent-shade)+ 會隨著懸停而加強的加重色光暈陰影 +translateY(-1px)升起效果。.brand-mark— 如果沒有提供 SVG,用於小型商標標記的小方塊/圓形。.grid-bg— 具有放射狀淡出遮罩的微妙 1px 網格,用於深色區塊下。.reveal/.revealed— IntersectionObserver 滾動顯現效果:opacity 0 → 1+translateY 28 → 0,持續時間 0.9s,使用cubic-bezier(0.16, 1, 0.3, 1)。.scrim-top/.scrim-bottom— 僅用於英雄區的漸層覆蓋層。- 按感覺而非顏色命名的區塊專用背景:
.sun-section— 明亮的主色加重色漸層 + 微妙的點狀紋理(「喜悅 / 打開包裝」節拍)。.album-section— 暖色米白紙張,放射狀加重色調 + 點狀微圖案,邊緣遮罩淡出。.roast-section— 深色背景搭配在對角位置的放射狀accent+accent2光暈 + 遮罩網格紋理。.signal-section— 滿版強烈加重色(通常是紅/橙/綠),用於行動結尾。
.polaroid— 白色卡片,內邊距14px 14px 44px 14px,柔和分層陰影,懸停時升起至translateY(-6px) rotate(0)。.polaroid-tape= 黃色/加重色膠帶條,絕對定位在頂部中央,旋轉 -4°,帶有虛線側邊提示。.stamp— 加重色的虛線邊框藥丸形狀,大寫,字母間距0.18em。.ribbon— 定價/熱門徽章,使用clip-path三角形底部,深色投影。.highlight-circle— 透過::after繪製的手繪風橢圓:在內聯<span>周圍旋轉 3px 的加重色邊框。用於包圍大字標題中最重要的一個詞(每個標題最多一個)。- 裝飾主題濾鏡:
.peanut-svg/. <motif>-svg帶有drop-shadow。 - 遵守
prefers-reduced-motion: reduce— 在 media query 內停用顯現動畫和平滑滾動。
階段 6 — App.tsx 架構
架構無可協商。第一次就要做對:
6a. 導入
import { useEffect, useRef, useState } from 'react';
import {
  Menu, X, ArrowLeft, ArrowRight, ArrowDown, ArrowUp, MousePointer2,
  // …加上 4-8 個品牌主題圖示(Heart, Sparkles, Cookie, PawPrint, Cpu, Leaf, …)
} from 'lucide-react';
6b. 在 App.tsx 內部定義的可重用元件
useReveal<T>()— 一個 IntersectionObserver hook,回傳一個 ref;在首次相交時(threshold 0.15)添加revealed類別。GlassCard— 包裝器,帶有 reveal hook,可選的strongprop,接受 className。Motif— 一個裝飾性 SVG 元件,主題與BRAND_CONTEXT相符(食物用花生、動物用爪子、科技用電路、自然用葉子、飲料用水滴、能量用閃電)。在深色/明亮區塊中,以低不透明度在 3-6 個位置浮動。ScrollToTopButton— 在 RTL 中固定在bottom-6 left-6/ 在 LTR 中固定在bottom-6 right-6。當window.scrollY > window.innerHeight * 0.6時出現。平滑滾動至頂部。簡短的語言適當標籤(「לראש」/「Top」/「أعلى」/「Inicio」)。
6c. 滑鼠拖曳效果(核心)
const videoRef = useRef<HTMLVideoElement>(null);
const stateRef = useRef({ targetTime: 0, isSeeking: false });

useEffect(() => {
  const video = videoRef.current;
  if (!video) return;

  const handleLoaded = () => {
    const mid = video.duration / 2;
    video.currentTime = mid;
    stateRef.current.targetTime = mid;
  };

  const handleSeeked = () => {
    const s = stateRef.current;
    s.isSeeking = false;
    if (Math.abs(s.targetTime - video.currentTime) > 0.01) {
      s.isSeeking = true;
      video.currentTime = s.targetTime;
    }
  };

  const handleMouseMove = (e: MouseEvent) => {
    const s = stateRef.current;
    const d = video.duration;
    if (!d || isNaN(d)) return;
    const normalized = e.clientX / window.innerWidth;
    // 如果主體相對於游標「向後」移動且感覺不對,可以選擇
    // 改用 `1 - (e.clientX / window.innerWidth)` — 先問使用者。
    s.targetTime = Math.max(0, Math.min(d, normalized * d));
    if (!s.isSeeking) { s.isSeeking = true; video.currentTime = s.targetTime; }
  };

  video.addEventListener('loadedmetadata', handleLoaded);
  video.addEventListener('seeked', handleSeeked);
  window.addEventListener('mousemove', handleMouseMove);
  return () => {
    video.removeEventListener('loadedmetadata', handleLoaded);
    video.removeEventListener('seeked', handleSeeked);
    window.removeEventListener('mousemove', handleMouseMove);
  };
}, []);
isSeeking 守衛至關重要 — 沒有它的話,滑鼠移動事件的觸發速度會比瀏覽器解碼的速度快,導致跳轉佇列溢位和可見的卡頓。
6d. 可點擊的滾動間諜導覽
const navItems: { label: string; target: string }[] = [
  { label: '<demo>',     target: 'top'     },
  { label: '<recipe>',   target: '…' },
  // 根據品牌背景和敘事弧線添加更多項目
];
階段 7 — 區塊庫(英雄區之後挑選 4-5 個)
從下方選擇。節拍順序必須與敘事弧線相符。每個區塊都是一個具有 id 屬性的 <section> 元素,以便滾動間諜能正確運作。
7a. 英雄區(固定)
<section id="top" className="relative h-screen overflow-hidden">
  <video
    ref={videoRef}
    className="absolute inset-0 w-full h-full object-cover"
    src="/hero.mp4"
    muted
    playsInline
  />
  {/* 玻璃覆蓋層與標題 */}
  <div className="relative z-10 flex flex-col items-center justify-center h-full">
    <GlassCard strong>
      <h1 className="text-5xl md:text-8xl font-display"><PRODUCT_NAME></h1>
      <p className="text-lg md:text-2xl mt-4 font-sans"><TAGLINE></p>
    </GlassCard>
  </div>
  {/* 頂部和底部漸層覆蓋層 */}
  <div className="scrim-top" />
  <div className="scrim-bottom" />
</section>
7b. 陽光區(喜悅 — 節拍 2)
<section id="joy" className="sun-section relative py-24 px-6">
  <div className="max-w-6xl mx-auto">
    {/* 巨大的幽靈字體背景 */}
    <span className="absolute top-4 left-4 text-9xl font-display opacity-5"><theme-word></span>
    <div className="grid grid-cols-1 md:grid-cols-2 gap-12 items-center">
      <div>
        <h2 className="text-4xl md:text-6xl font-display mb-6">…</h2>
        <p className="text-lg leading-relaxed">…</p>
        {/* 統計卡片 */}
        <div className="flex gap-6 mt-8">
          <GlassCard>…</GlassCard>
          <GlassCard>…</GlassCard>
        </div>
      </div>
      <div>
        {/* 主題 SVG 或產品圖片 */}
      </div>
    </div>
  </div>
  {/* 浮動主題 SVG */}
  <Motif className="absolute bottom-8 right-8 opacity-20 w-32 h-32" />
</section>
7c. 相簿區(懷舊 — 節拍 3)
<section id="nostalgia" className="album-section relative py-24 px-6">
  <div className="max-w-6xl mx-auto">
    <h2 className="text-4xl md:text-6xl font-display text-center mb-16">…</h2>
    <div className="flex flex-wrap justify-center gap-8">
      {/* 拍立得風格卡片 */}
      <div className="polaroid w-64">
        <img src="/product.jpg" alt="…" className="w-full h-48 object-cover rounded" />
        <p className="mt-4 text-center italic">…</p>
        <div className="polaroid-tape" />
      </div>
      {/* 更多拍立得卡片 */}
    </div>
  </div>
</section>
7d. 烘烤區(沉思 — 節拍 4)
<section id="contemplation" className="roast-section relative py-24 px-6">
  <div className="max-w-6xl mx-auto">
    <h2 className="text-4xl md:text-6xl font-display text-center mb-16">…</h2>
    <div className="grid grid-cols-1 md:grid-cols-3 gap-8">
      {/* 每張定價卡片都有不同的視覺處理 */}
      <GlassCard>…</GlassCard>
      <GlassCard strong>…</GlassCard> {/* 特色卡片 */}
      <GlassCard>…</GlassCard>
    </div>
  </div>
</section>
7e. 信號區(行動 — 節拍 5)
<section id="action" className="signal-section relative py-24 px-6">
  <div className="max-w-4xl mx-auto text-center">
    <h2 className="text-5xl md:text-7xl font-display mb-6">…</h2>
    <p className="text-xl mb-8">…</p>
    <button className="cta-primary text-lg px-8 py-4 rounded-full">
      <TAGLINE> 的 <PRODUCT_NAME> →
    </button>
  </div>
</section>
階段 8 — 嚴格規則(優先於任何矛盾的「最佳實務」)
- 沒有
#FFFFFF— 使用cream(提取的暖色米白)作為淺色文字。純白色破壞氛圍。 - 沒有黑色 — 使用
background(提取的深色)用於深色背景。從不#000000。 - 唯一的白色在拍立得卡片上 — 產品圖片使用
#FFFFFF和#F5F5F5,照片用#FAFAFA。其他地方沒有純白色。 - 標題中沒有句號 — 大標題永不包含句點。副標題在單句時也不使用句點。多句時才使用。
- 網格用於結構,但永遠不要將所有內容都放在網格中 — 將重點元素偏移以營造動感。
- 沒有水平分隔線 — 使用間距、顏色轉換或微妙的紋理斷裂來分隔區塊,而不是
<hr>。 - 最少文字 — 每個區塊不多於 15-20 個單詞。英雄區 1 個短語。讓影片和圖片傳達。
- 攝影中的黃色 — 如果品牌是暖色的,在照片和影片調色中始終保留一點黃色。黃色是懷舊的捷徑。
- 總是包含一個幽默或俏皮的主題 SVG — 表情符號、扭曲的輪廓、低多邊形動物。將它放入
.motif容器中。 - 背景永遠是深色、米白或加重色 — 沒有淺灰色或白色背景(除非它是拍立得卡片)。
- 導覽列始終固定,在英雄區下方滑入 — 使用
position: sticky; top: 0;並在滾動經過英雄區後添加類別來添加背景。 - 始終有 ScrollToTop — 放在左側以對稱左右掃視。
階段 9 — 驗證(在說「完成」之前執行)
- 1.
hero.mp4存在且小於 50 MB? - 2. ffmpeg 重新編碼使用
-g 1? - 3. 影片 muted + playsInline?
- 4. 滑鼠水平移動會拖曳影片時間軸?
- 5. 沒有 seek 佇列溢位卡頓?(測試快速移動)
- 6. 區塊完全不透明(無影片穿透)?
- 7. 每個區塊都有自己的背景主題?
- 8. 信號區是最後一個區塊?
- 9. 導覽列固定在頂部並有滾動間諜?
- 10. ScrollToTop 按鈕在滾動超過 60% 後出現?
- 11. RTL 設定 — 文字從右到左?
- 12. 沒有
#FFFFFF背景?
附錄:從 CLI 執行此技能的提示
你可以將 .skills/hoodini-ai-agents-skills/SKILL.md 的完整路徑傳遞給支援技能檔案的 CLI 工具(如 Claude Code 或 Codex)。或者,將完整的提示範本(在 references/GOLDEN_PROMPT.md 中)與填好的 YAML 一起貼上。